Navy Mars – Surviving the Outdoors
![]()
The #1 Resource for Survivors
Proudly serving those who serve in the U.S. Navy, Marine Corps, and Coast Guard
Also supporting FEMA, Homeland Security, NOAA, and local Emergency Management Agencies
When you first start getting into the survival lifestyle, it can be pretty daunting. There are so many different pieces of gear you need and types of skills that you have to learn, many people get discouraged. Don’t worry. We are here to help!
Having an expert background in survival, hunting, and outdoor adventures, we review all of the essential survival gear that you need to supply in your SHTF plan and pack in your bug out bag.
Our goal at Navy Mars is to deliver professional-grade survival information directly to all our readers.
There’s a lot of information out there and a ton of different products to choose from, but that’s also what makes it fun! We’ll help you find the right gear for you and your lifestyle. Here are some of our most popular reviews.
Popular Survival Reviews
Best Bug Out Bags
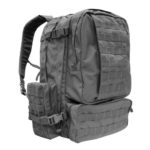
Bug out bags, also commonly called bail out bags, go bags, SHTF bags, survival bags, among other common names, can be helpful for those who wish to prepare themselves for emergencies, such as natural or man-made disasters.
Camping Water Filters

When you are hiking, camping, and engaging in other outdoor activities, it is always important to remember to have plenty of filtered and safe drinking water in order to keep yourself properly hydrated, especially in the sun.
Emergency Food Rations
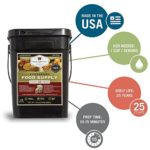
Emergency food supplies are one of the most popular survival items there is. They have a long shelf life and are great for keeping on hand in case natural or man-made disasters occur.
Popular Survival Supplies
- EMP Devices
- Solar Chargers
- Solar Cookers
- Survival Lighters
- Emergency Crank Radios
- Bushcraft Knives
- Vehicle Emergency Kits